A9G使用MicroPython进行开发
这一小节是我额外补充上来的,本来我已经准备把这一小节的内容写到上一篇文章中的安信可A9G开发板,但是我想了下,MicroPython现在也挺方便的,虽然我个人来说不太喜欢,分开写就又是一篇水文了,这不挺好的嘛。
A9G是支持MicroPython进行开发的,最起码能使用绝大多数功能的,我也尝试了几个简单的例子,没啥太大问题。
以前是Neutree:
Neutree/micropython
后来是普利金(pulkin)在维护了:
pulkin/micropython
下面是功能支持列表,PWM不支持。
- [x] GPIO:
machine.Pin - [x] ADC:
machine.ADC - [ ] PWM:
machine.PWM - [x] UART:
machine.UART(hw) - [x] SPI:
machine.SPI(sw) - [x] I2C:
i2c(hw) - [x] Cellular misc (IMEI, ICCID, ...):
cellular - [x] GPS:
gps - [x] time:
utime - [x] File system
- [x] GPRS, DNS:
cellular,socket,ssl - [x] Power:
machine - [x] Calls:
cellular - [x] SMS:
cellular.SMS
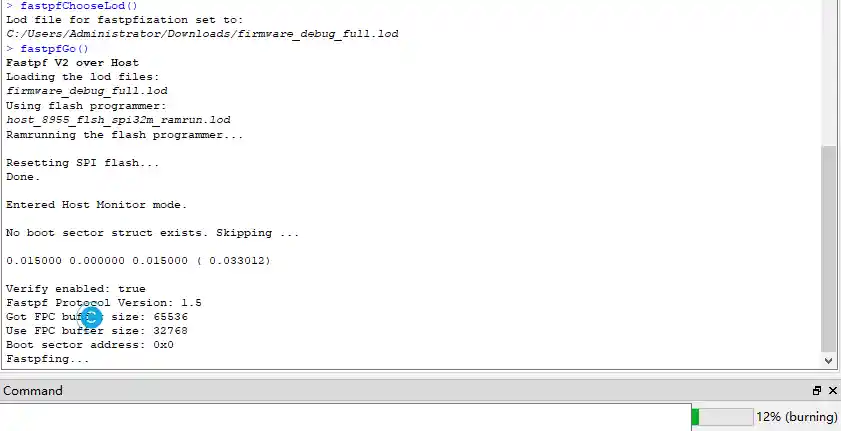
首先要下载使用编译好的固件bin,我用的:firmware_debug_full.lod,还是使用coolwatcher烧写。

在gprs_a9的README.md中,保存着A9G的MicroPython说明文件,很多关键的步骤都写在上面了。
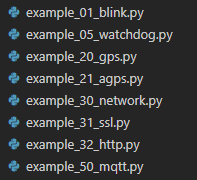
在\ports\gprs_a9\examples中有提供的几个例程,不是特别多,但是很基本了。
下面的内容来自官方文档,我改成了中文,并对里面的一些内容进行了修改。
1. 编译
固件映像由Azure pipelines自动生成: download.如果你并不需要预先编译文件,可以选择性的跳过一些内容。
按照以下步骤从源代码编译生成:
1.安装依赖项 (Ubuntu示例来自 .travis.yml):
sudo apt-get install build-essential gcc-multilib g++-multilib libzip-dev zlib1g lib32z12.git clone (必要时安装 sudo apt install git )
警告: 这样做下载的文件尺寸大
git clone git@github.com:pulkin/micropython.git --recursive或者这样做,下载的文件尺寸小一些:
git clone git@github.com:pulkin/micropython.git
git submodule update --init --recursive lib/axtls lib/GPRS_C_SDK lib/csdtk42-linux
3.Make
cd micropython
make -C mpy-cross
cd ports/gprs_a9
make
2. 烧写
参考文档: documentation
(cooltools在 lib/csdtk42-linux/cooltools/中提供).
因为前面的操作都是在Linux下完成的,所以pulkin的文档写的Linux下的烧写工具版本,道理是一样的。这时的TTL连接是在HST_TX,HST_RX上的。
3. 连接
使用 pyserial 或其他终端。
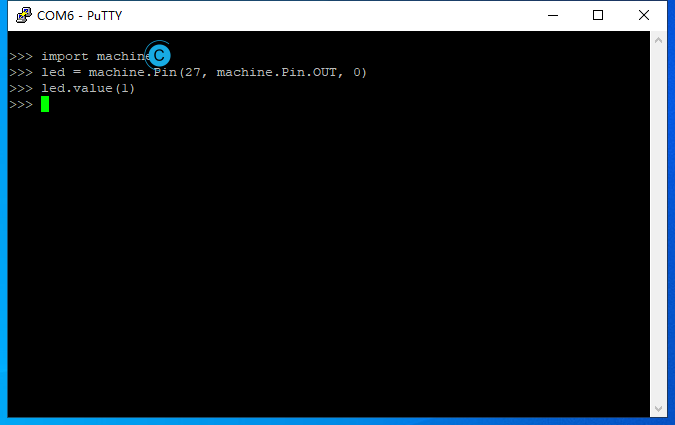
miniterm.py /dev/ttyUSB1 115200 --raw我使用的Putty。直接连接串口就好了。要注意的是,当完成上一步的.bin文件烧写以后,需要将TTL的连接线从HST_TX,HST_RX换到TX1,RX1上,下面的操作都可以这样保持,除非你要重新执行前面的操作。
4. 上传脚本
上传脚本到开发板使用的是ampy,所以pulkin的文档给出了ampy(Adafruit MicroPython Tool): ampy。
ampy --port /dev/ttyUSB1 put frozentest.py安装一下ampy:
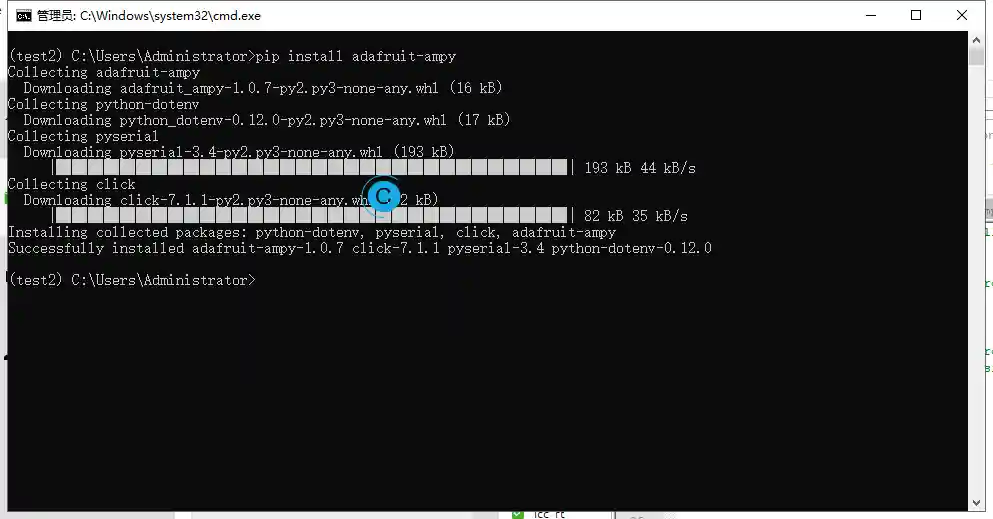
CMD下:
set AMPY_PORT=COM6
连接到串口。
ampy ls
查看设备内文件。

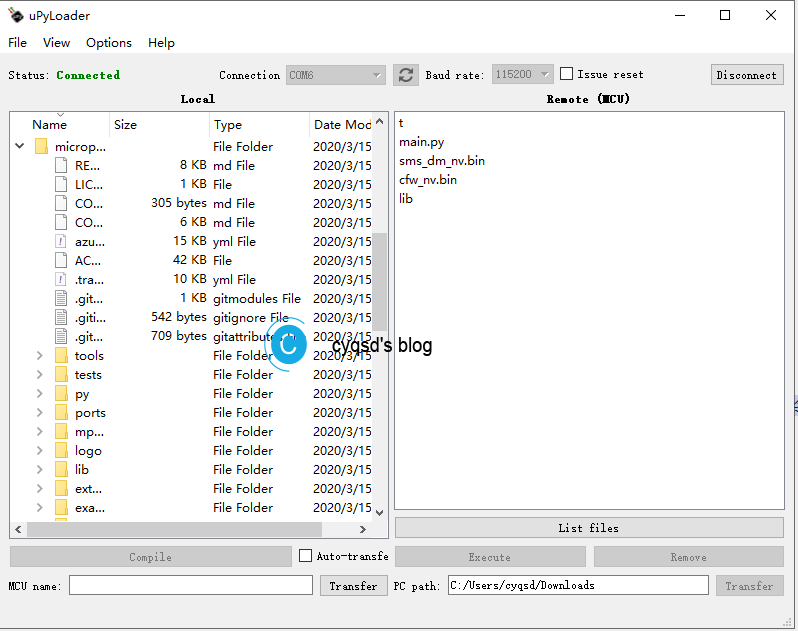
如果你不怎么喜欢用命令来操作这个,也可以使用BetaRavener/uPyLoader,但我我觉得不是很好用,用命令来操作就足够了。
5. 运行脚本
>>> help()
>>> import frozentest
>>> import blink
blink.blink(1)
你可以通过前面小节的"连接",使用pyserial或者Putty等终端进行连接。
6. 案例程序
使用ampy的run或者put命令,分别的意思是运行文件和上传文件至开发板。
Usage: ampy [OPTIONS] COMMAND [ARGS]...

  ampy - Adafruit MicroPython Tool

  Ampy is a tool to control MicroPython boards over a serial connection.
  Using ampy you can manipulate files on the board's internal filesystem and
  even run scripts.

Options:
  -p, --port PORT  Name of serial port for connected board.  [required]
  -b, --baud BAUD  Baud rate for the serial connection. (default 115200)
  -d, --delay DELAY Delay in seconds before entering RAW MODE (default 0)
  --help           Show this message and exit.

Commands:
  get  Retrieve a file from the board.
  ls   List contents of a directory on the board.
  put  Put a file on the board.
  rm   Remove a file from the board.
  run  Run a script and print its output.
上传的.py程序在重置或者重新上电不会接着运行,如果想要重置或者重新上电(重新开机)后就会运行,那么需要修改文件名为main.py,这样一开始就会启动,错误也会在一开始就输出起来,如果你的程序需要等一会儿才知道结果,比如连接网络超时,那么才上电的那个时候看起来就像是假死了一样,稍微注意一下就好了。
A9G的MicroPython内容不是特别多,但是ESP8266和ESP32的内容挺多的,遇到问题可以看类似的。
前面提到了\ports\gprs_a9\examples中有案例。我们可以拿来用一下。
example_01_blink.py一个简单的亮灯程序。
# Micropython a9g example
# Source: https://github.com/pulkin/micropython
# Author: pulkin
# Demonstrates how to blink the built-in LED on the pudding board
import machine
import time

# Built-in blue LED on the pudding board
led = machine.Pin(27, machine.Pin.OUT, 0)
value = 1
for i in range(4):
    led.value(value)
    time.sleep(1)
    value = 0 if (value==1) else 1
27和28是A9G的两个指示灯的引脚,通过machine.Pin(27, machine.Pin.OUT, 0)就可以很容易的进行操作。
example_32_http.pyHTTP请求例程。
# Micropython a9g example
# Source: https://github.com/pulkin/micropython
# Author: pulkin
# Demonstrates how to communicate via http using requests library

# Get online
import cellular
cellular.gprs("internet", "", "")

# Import mqtt (download client if necessary)
try:
    import urequests
except ImportError:
    import upip
    upip.install("micropython-urequests")
    import urequests

r = urequests.get("http://httpstat.us/200")
print(r.status_code, r.text)
可以修改这个例程,进行Http_Post请求GPS Tracker服务器,和前文相同。运行时,我们需要对APN进行设置,默认是:
cellular.gprs("internet", "", "")
修改internet为cmnet即可,当然根据你使用的SIM卡的实际运营商修改。Example on how to automatically connect to the APN #38
example_50_mqtt.pyMQTT的测试。
# Micropython a9g example
# Source: https://github.com/pulkin/micropython
# Author: pulkin
# Demonstrates how to use mqtt for publishing GPS location

# Get online
import cellular
cellular.gprs("internet", "", "")

# Import mqtt (download client if necessary)
try:
    from umqtt import simple
except ImportError:
    import upip
    upip.install("micropython-umqtt.simple")
    from umqtt import simple

# Turn GPS on
import gps
gps.on()

# Report location
name = "a9g-micropython-board"
server = "test.mosquitto.org"
topic = "a9g-micropython-board-topic"
print("To track messages run, for example\n  mosquitto_sub -h {server} -t \"{topic}\" -v".format(server=server, topic=topic))
import json
client = simple.MQTTClient(name, server)
client.connect()
data = json.dumps(gps.get_last_location())
print("Publishing", data)
client.publish(topic, data)
MQTT的测试这个例程就涵盖了常见的操作了。我们只需进行简单的修改,即可使用。
name,server,topic按照实际部署即可。有时候我们加上连接用户名和密码,从定义上就可以知道,加入port=0, user=None, password=None就好了。
class MQTTClient:
    def __init__(self, client_id, server, port=0, user=None, password=None, keeyalive=0, ssl=False, ssl_params={}):
        """
        Create a mqtt client object.

        - client_id
        - server
        - port
        - user
        - password
        - keeyalive
        - ssl
        - ssl_params
        """
        ...
gps.get_last_location()可以很容易的拿到GPS的坐标,方便很多。
这个操作很前文的差不多,我就不额外多写了,和前面的换汤不换药。MicroPython的操作很简单,但我还是觉得用C开发的好。。。。我依旧推荐看上一篇文章中的内容。
本作品采用 知识共享署名-相同方式共享 4.0 国际许可协议 进行许可。