使用Arduino为ATmega 328P烧写Bootloader
这次捣鼓的是自己画了一块基于ATMEGA 328P-MU P的PCB板。因为328P是买的全新的,需要贴上上去。芯片里面没有Bootloader,也无法通过Arduino IDE直接开发,这就需要先写进去Bootloader。挺常规的一个问题,网上提供的资料也非常多,就不详细写了。理论上使用对所有的支持AVR芯片进行编程的工具都是可以进行操作的,可以是:progisp,用这类工具唯一需要注意的就是熔丝,这个可以从Arduino IDE里面找到。简单的就是使用一块支持Arduino的板子进行烧录,这就很简单了。这里用了块普普通通的Arduino Uno。
分区是这样的:
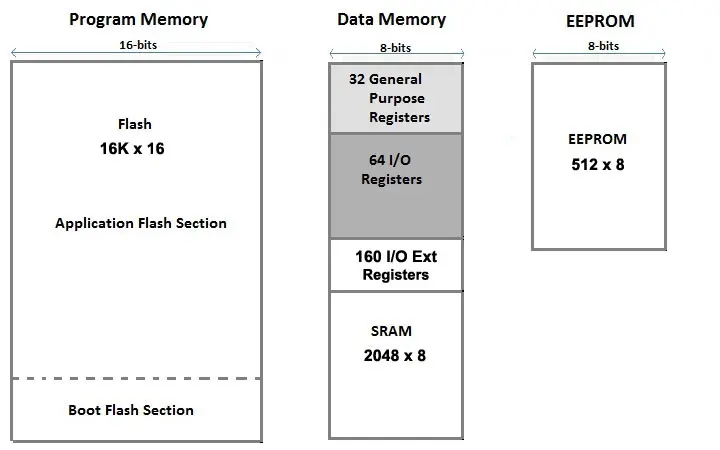
烧录期间的过程遇到了非常多的报错类型,各种各样的都有,有的是虚焊,有的是晶振,但是也很常规,也很好解决。
网上的资料非常的多:
官方的文档:Arduino as ISP and Arduino Bootloaders
Bootload an ATmega328
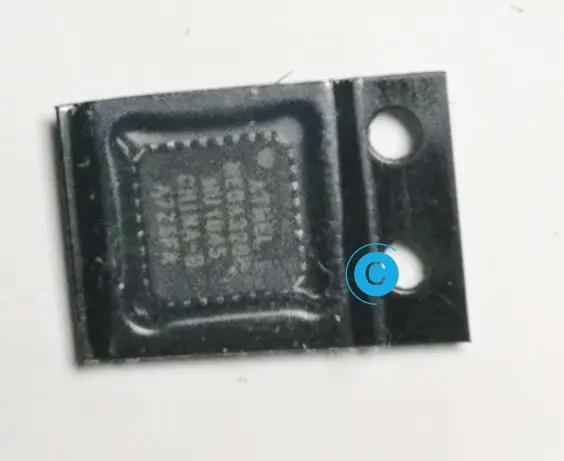
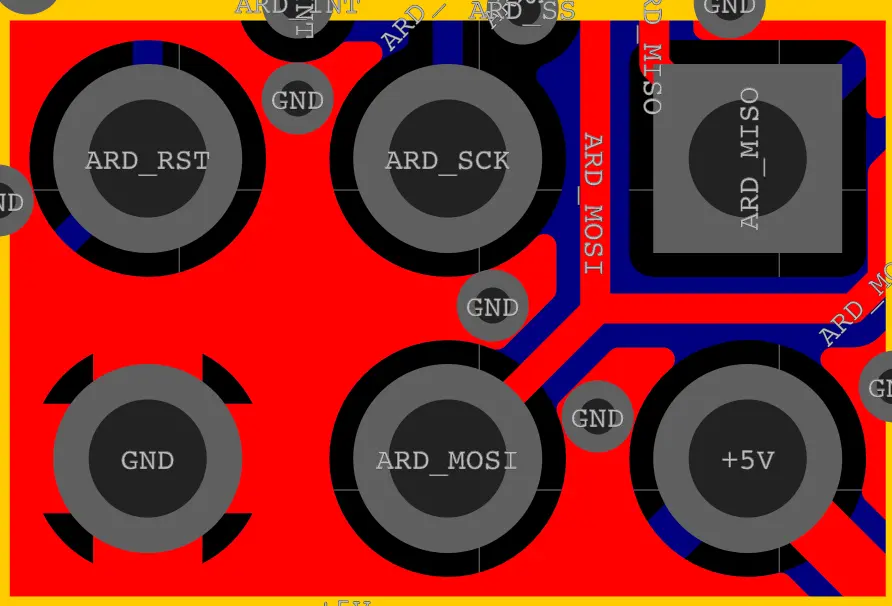
封装如下:
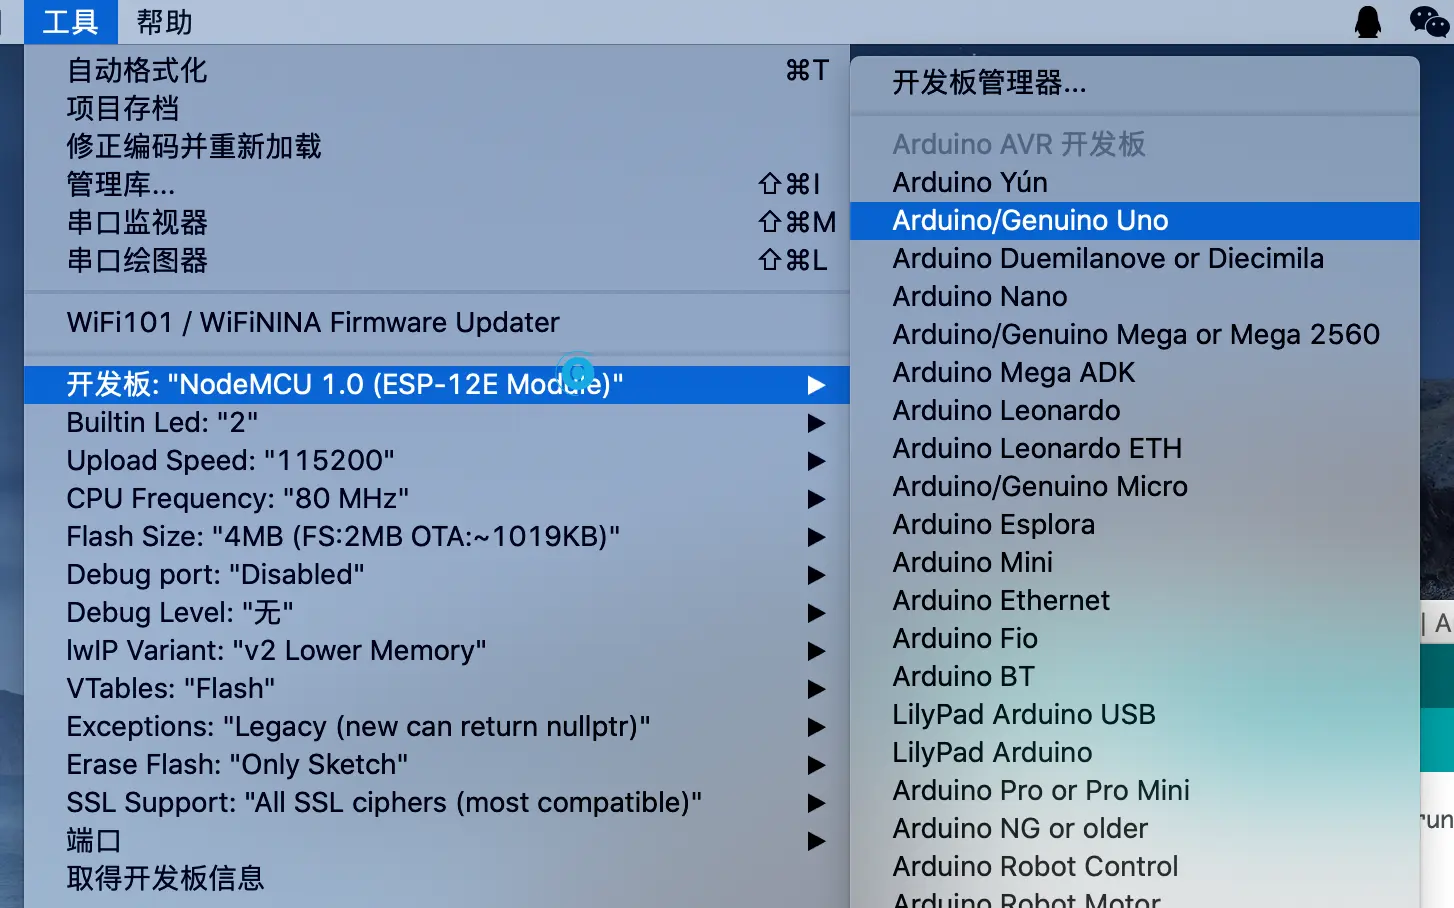
使用Arduino Uno先更改开发版为Arduino Uno。
从例程里面找到ArduinoISP。
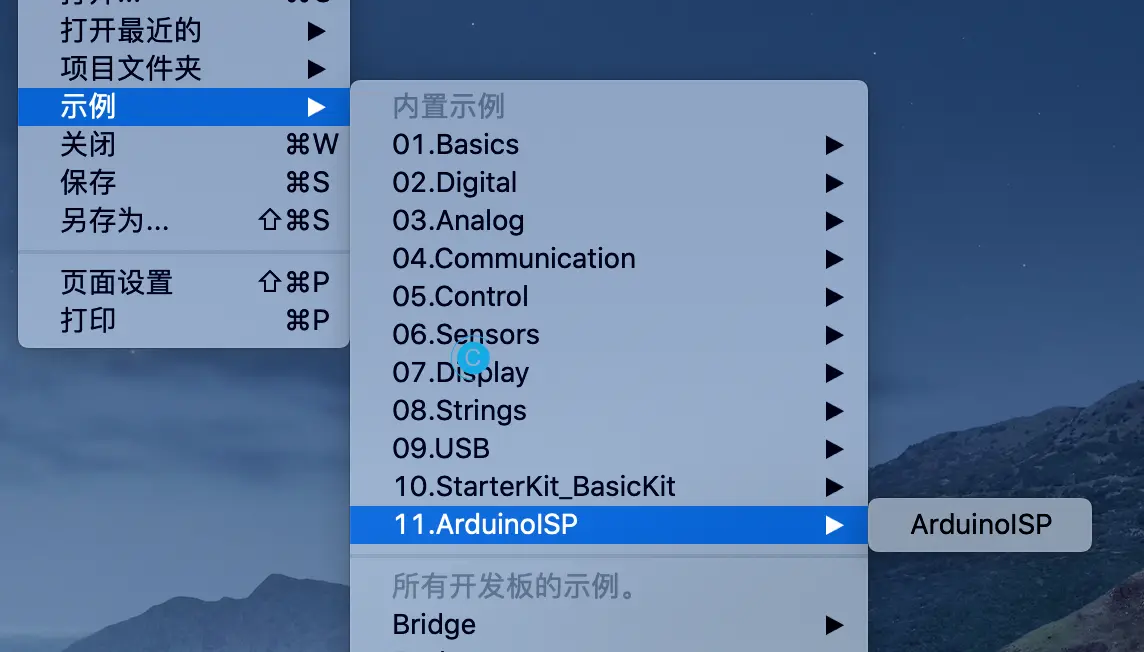
下面是打开例程:
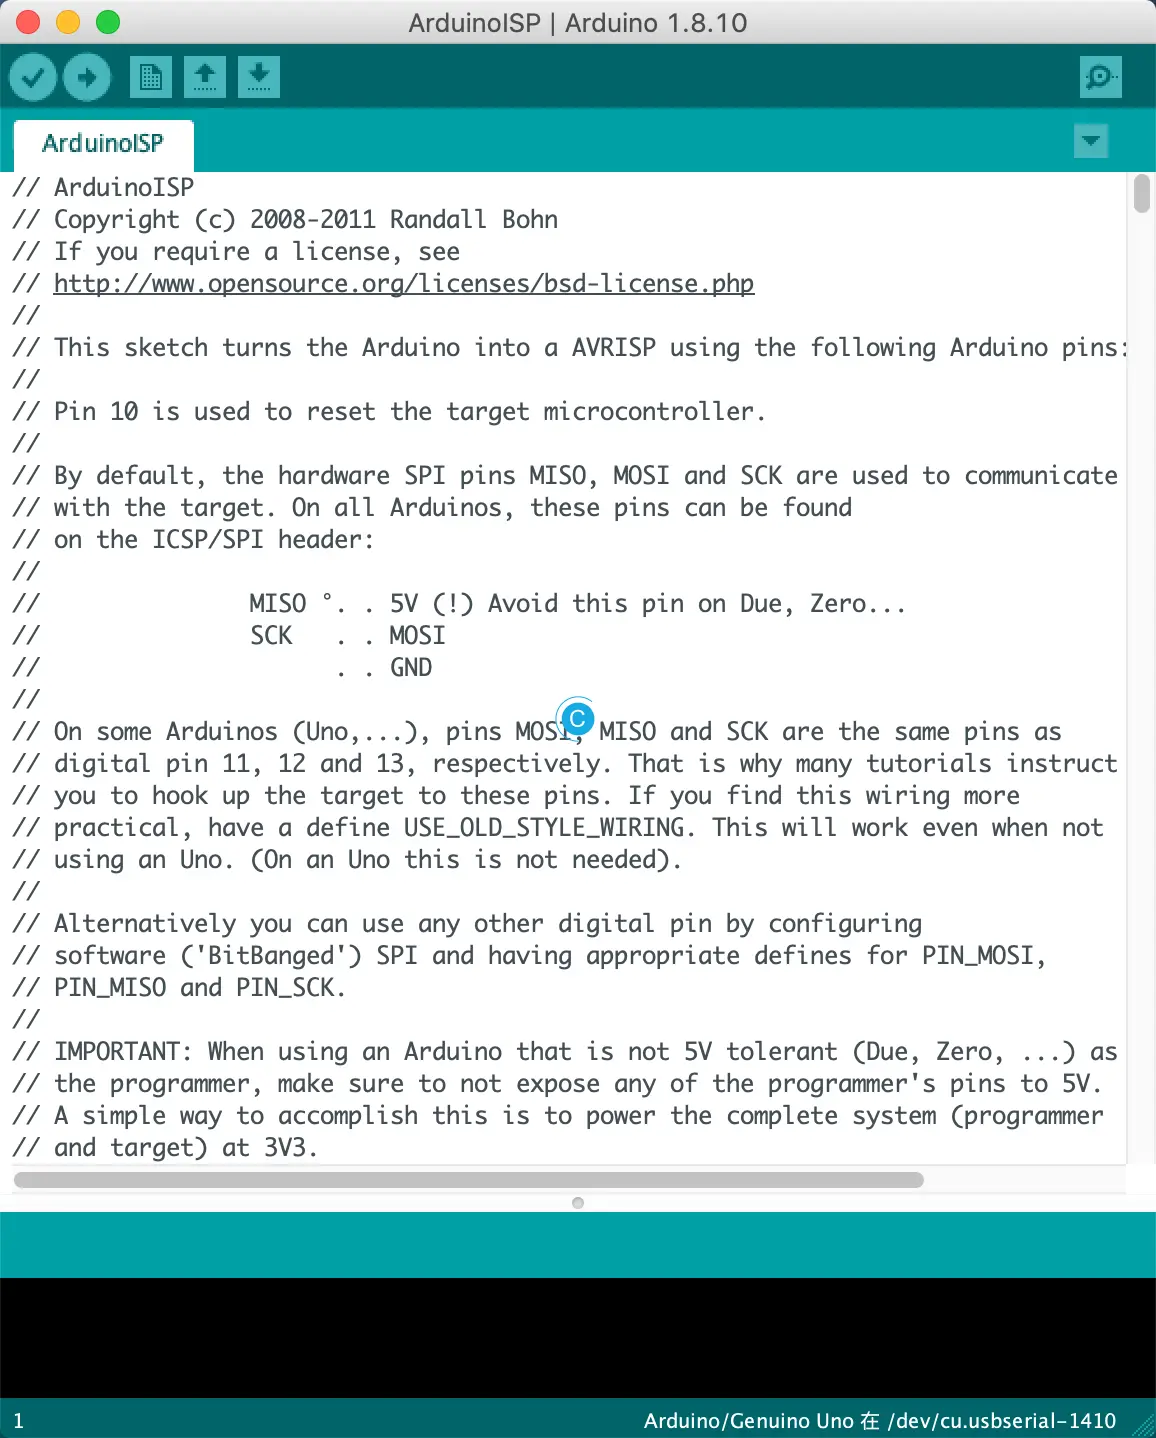
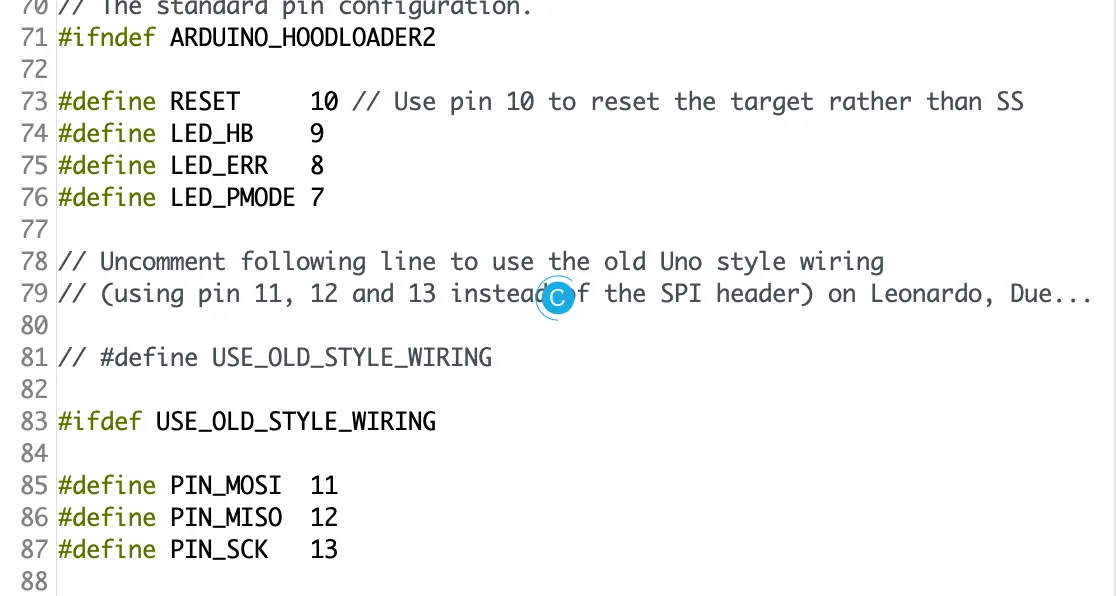
里面的宏定义写了连接的PIN线路。
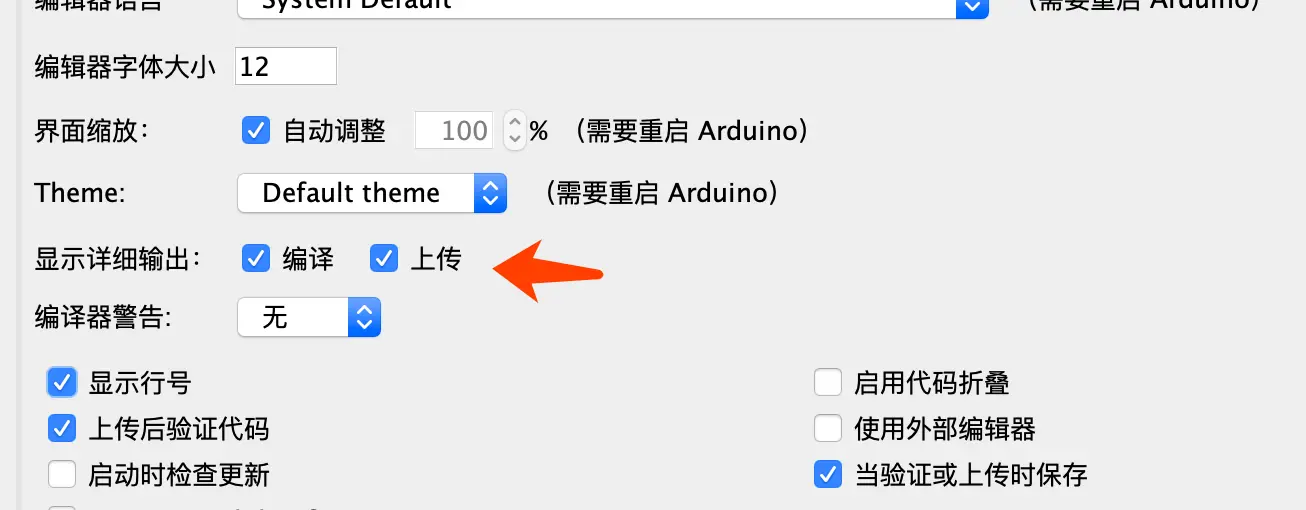
还有就是推荐打开编辑器的报错,这样便于找到问题。
有几个定义
#define RESET     10 // Use pin 10 to reset the target rather than SS

#define PIN_MOSI    11
#define PIN_MISO    12
#define PIN_SCK    13
如果你使用的开发板并不是UNO可以参考官方提供的下表:

连接ATmega328P的ICSP连接器。请注意,Rev.3板具有管理USB连接的ATMega 16U2芯片,并且可以通过位于ATMega
16U2本身上方的专用连接器ICSP2重新编程该芯片。
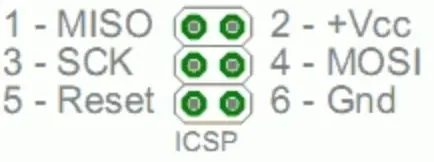
如果还是没有就手动修改引脚了。我的是这样,不过还是一回事:
总的来说现在想起来自己画个这个真是成本太高,有点得不偿失。意义不大。
下面还有调整波特率的:
// Configure the baud rate:

#define BAUDRATE    19200
// #define BAUDRATE    115200
// #define BAUDRATE    1000000
实物的连接是这样:
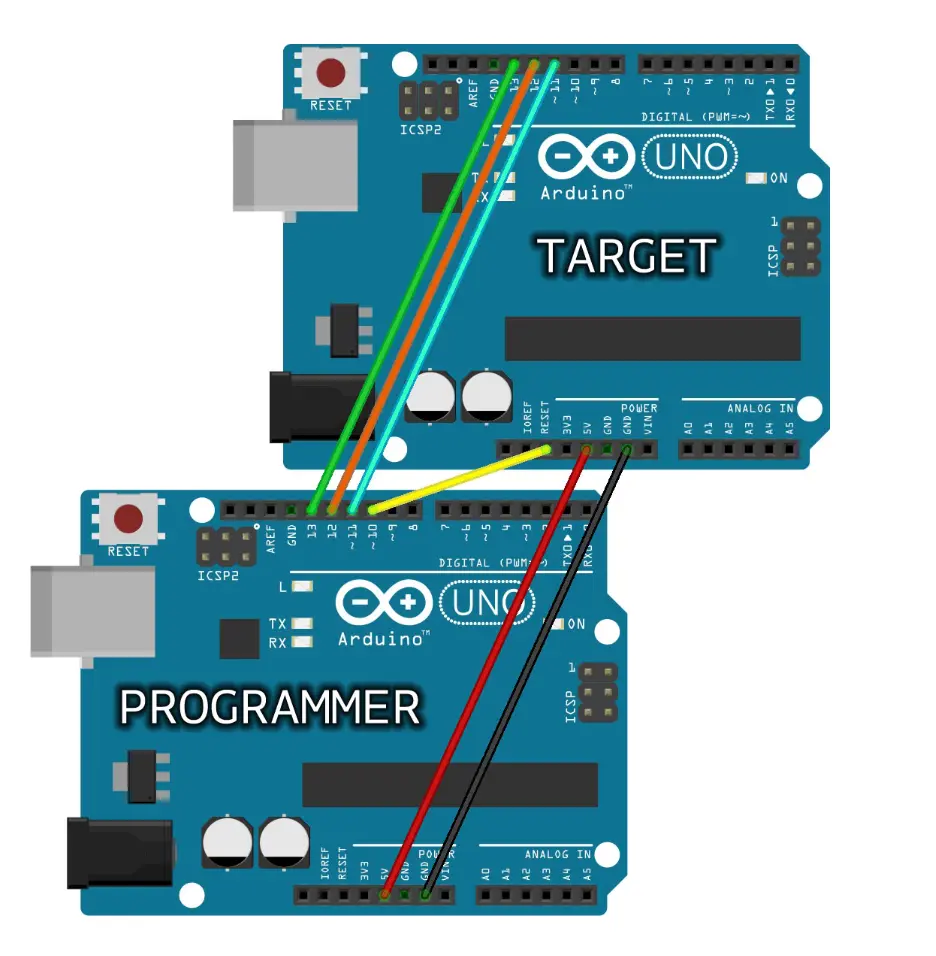
连接好了线路,再次修改Arduino IDE里面的设备,这次修改为待烧写的板子型号,328P的话可以选择Arduino Nano或Micro。
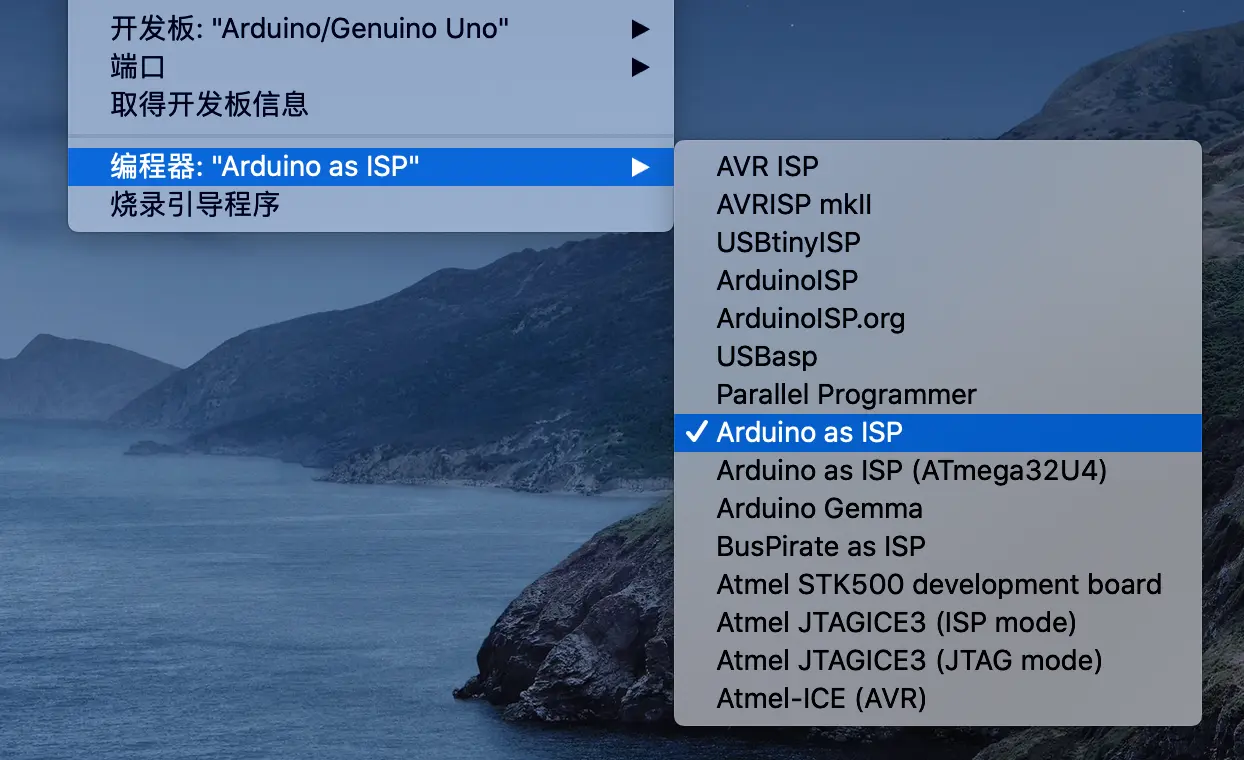
选择编程器Arduino as ISP,要是使用的其他的设备就按照连接的烧写器选择即可。
然后就,选择烧录引导程序。
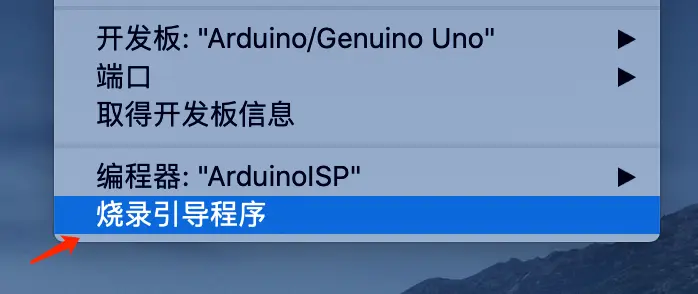
下面是输出的完整日志:
avrdude: Version 6.3-20190619
         Copyright (c) 2000-2005 Brian Dean, http://www.bdmicro.com/
         Copyright (c) 2007-2014 Joerg Wunsch

         System wide configuration file is "D:\arduino-1.8.10\hardware\tools\avr/etc/avrdude.conf"

         Using Port                    : COM3
         Using Programmer              : stk500v1
         Overriding Baud Rate          : 19200
         AVR Part                      : ATmega328P
         Chip Erase delay              : 9000 us
         PAGEL                         : PD7
         BS2                           : PC2
         RESET disposition             : dedicated
         RETRY pulse                   : SCK
         serial program mode           : yes
         parallel program mode         : yes
         Timeout                       : 200
         StabDelay                     : 100
         CmdexeDelay                   : 25
         SyncLoops                     : 32
         ByteDelay                     : 0
         PollIndex                     : 3
         PollValue                     : 0x53
         Memory Detail                 :

                                  Block Poll               Page                       Polled
           Memory Type Mode Delay Size  Indx Paged  Size   Size #Pages MinW  MaxW   ReadBack
           ----------- ---- ----- ----- ---- ------ ------ ---- ------ ----- ----- ---------
           eeprom        65    20     4    0 no       1024    4      0  3600  3600 0xff 0xff
           flash         65     6   128    0 yes     32768  128    256  4500  4500 0xff 0xff
           lfuse          0     0     0    0 no          1    0      0  4500  4500 0x00 0x00
           hfuse          0     0     0    0 no          1    0      0  4500  4500 0x00 0x00
           efuse          0     0     0    0 no          1    0      0  4500  4500 0x00 0x00
           lock           0     0     0    0 no          1    0      0  4500  4500 0x00 0x00
           calibration    0     0     0    0 no          1    0      0     0     0 0x00 0x00
           signature      0     0     0    0 no          3    0      0     0     0 0x00 0x00

         Programmer Type : STK500
         Description     : Atmel STK500 Version 1.x firmware
         Hardware Version: 2
         Firmware Version: 1.18
         Topcard         : Unknown
         Vtarget         : 0.0 V
         Varef           : 0.0 V
         Oscillator      : Off
         SCK period      : 0.1 us

avrdude: AVR device initialized and ready to accept instructions

Reading | ################################################## | 100% 0.02s

avrdude: Device signature = 0x1e950f (probably m328p)
avrdude: NOTE: "flash" memory has been specified, an erase cycle will be performed
         To disable this feature, specify the -D option.
avrdude: erasing chip
avrdude: reading input file "D:\arduino-1.8.10\hardware\arduino\avr/bootloaders/optiboot/optiboot_atmega328.hex"
avrdude: writing flash (32768 bytes):

Writing | ################################################## | 100% 0.00s

avrdude: 32768 bytes of flash written
avrdude: verifying flash memory against D:\arduino-1.8.10\hardware\arduino\avr/bootloaders/optiboot/optiboot_atmega328.hex:
avrdude: load data flash data from input file D:\arduino-1.8.10\hardware\arduino\avr/bootloaders/optiboot/optiboot_atmega328.hex:
avrdude: input file D:\arduino-1.8.10\hardware\arduino\avr/bootloaders/optiboot/optiboot_atmega328.hex contains 32768 bytes
avrdude: reading on-chip flash data:

Reading | ################################################## | 100% -0.00s

avrdude: verifying ...
avrdude: 32768 bytes of flash verified
avrdude: reading input file "0x0F"
avrdude: writing lock (1 bytes):

Writing | ################################################## | 100% 0.02s

avrdude: 1 bytes of lock written
avrdude: verifying lock memory against 0x0F:
avrdude: load data lock data from input file 0x0F:
avrdude: input file 0x0F contains 1 bytes
avrdude: reading on-chip lock data:

Reading | ################################################## | 100% 0.01s

avrdude: verifying ...
avrdude: 1 bytes of lock verified

avrdude done.  Thank you.
最后就是完成了,如果显示的是验证错误啥的,多半是虚焊。
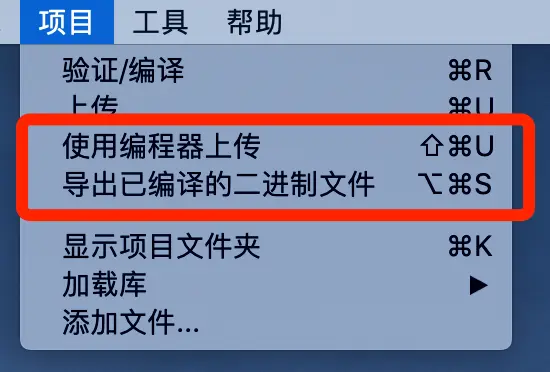
往后可以:
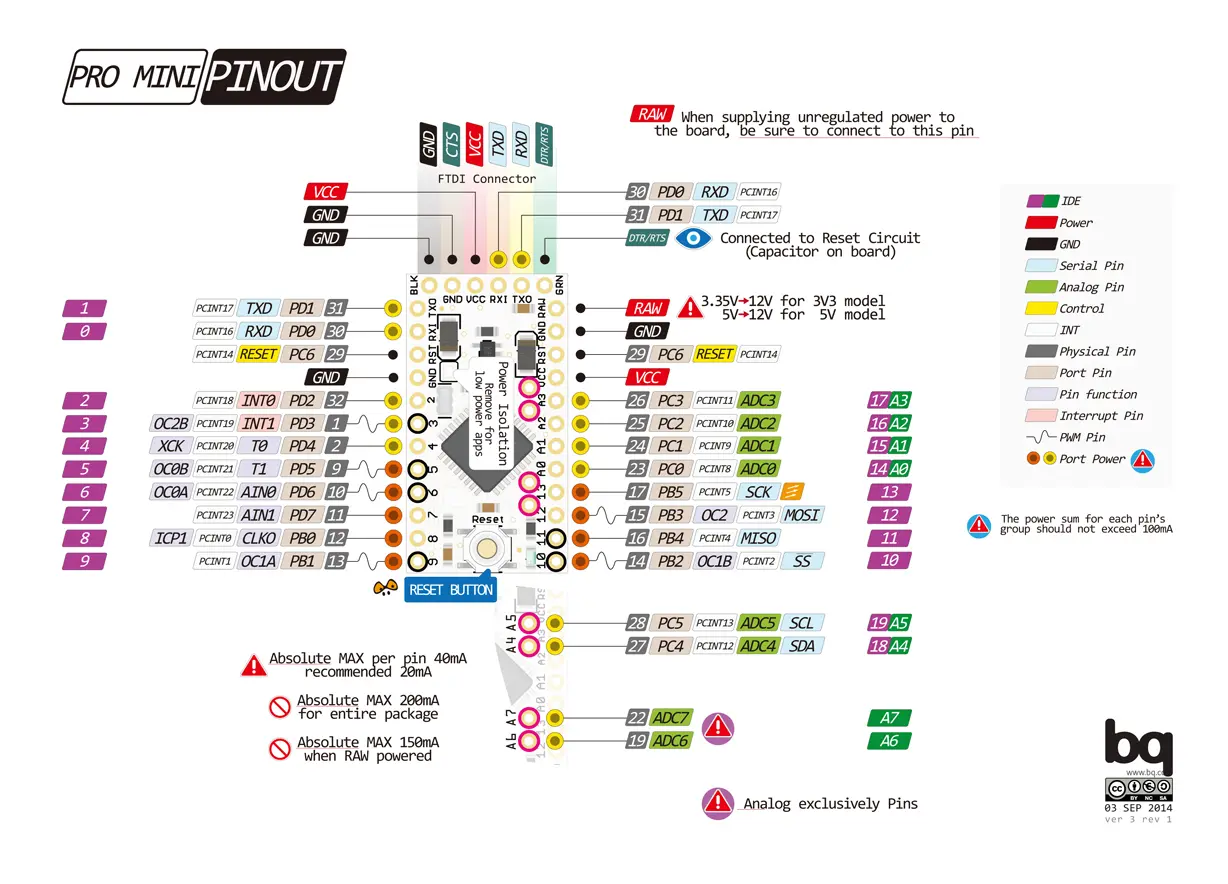
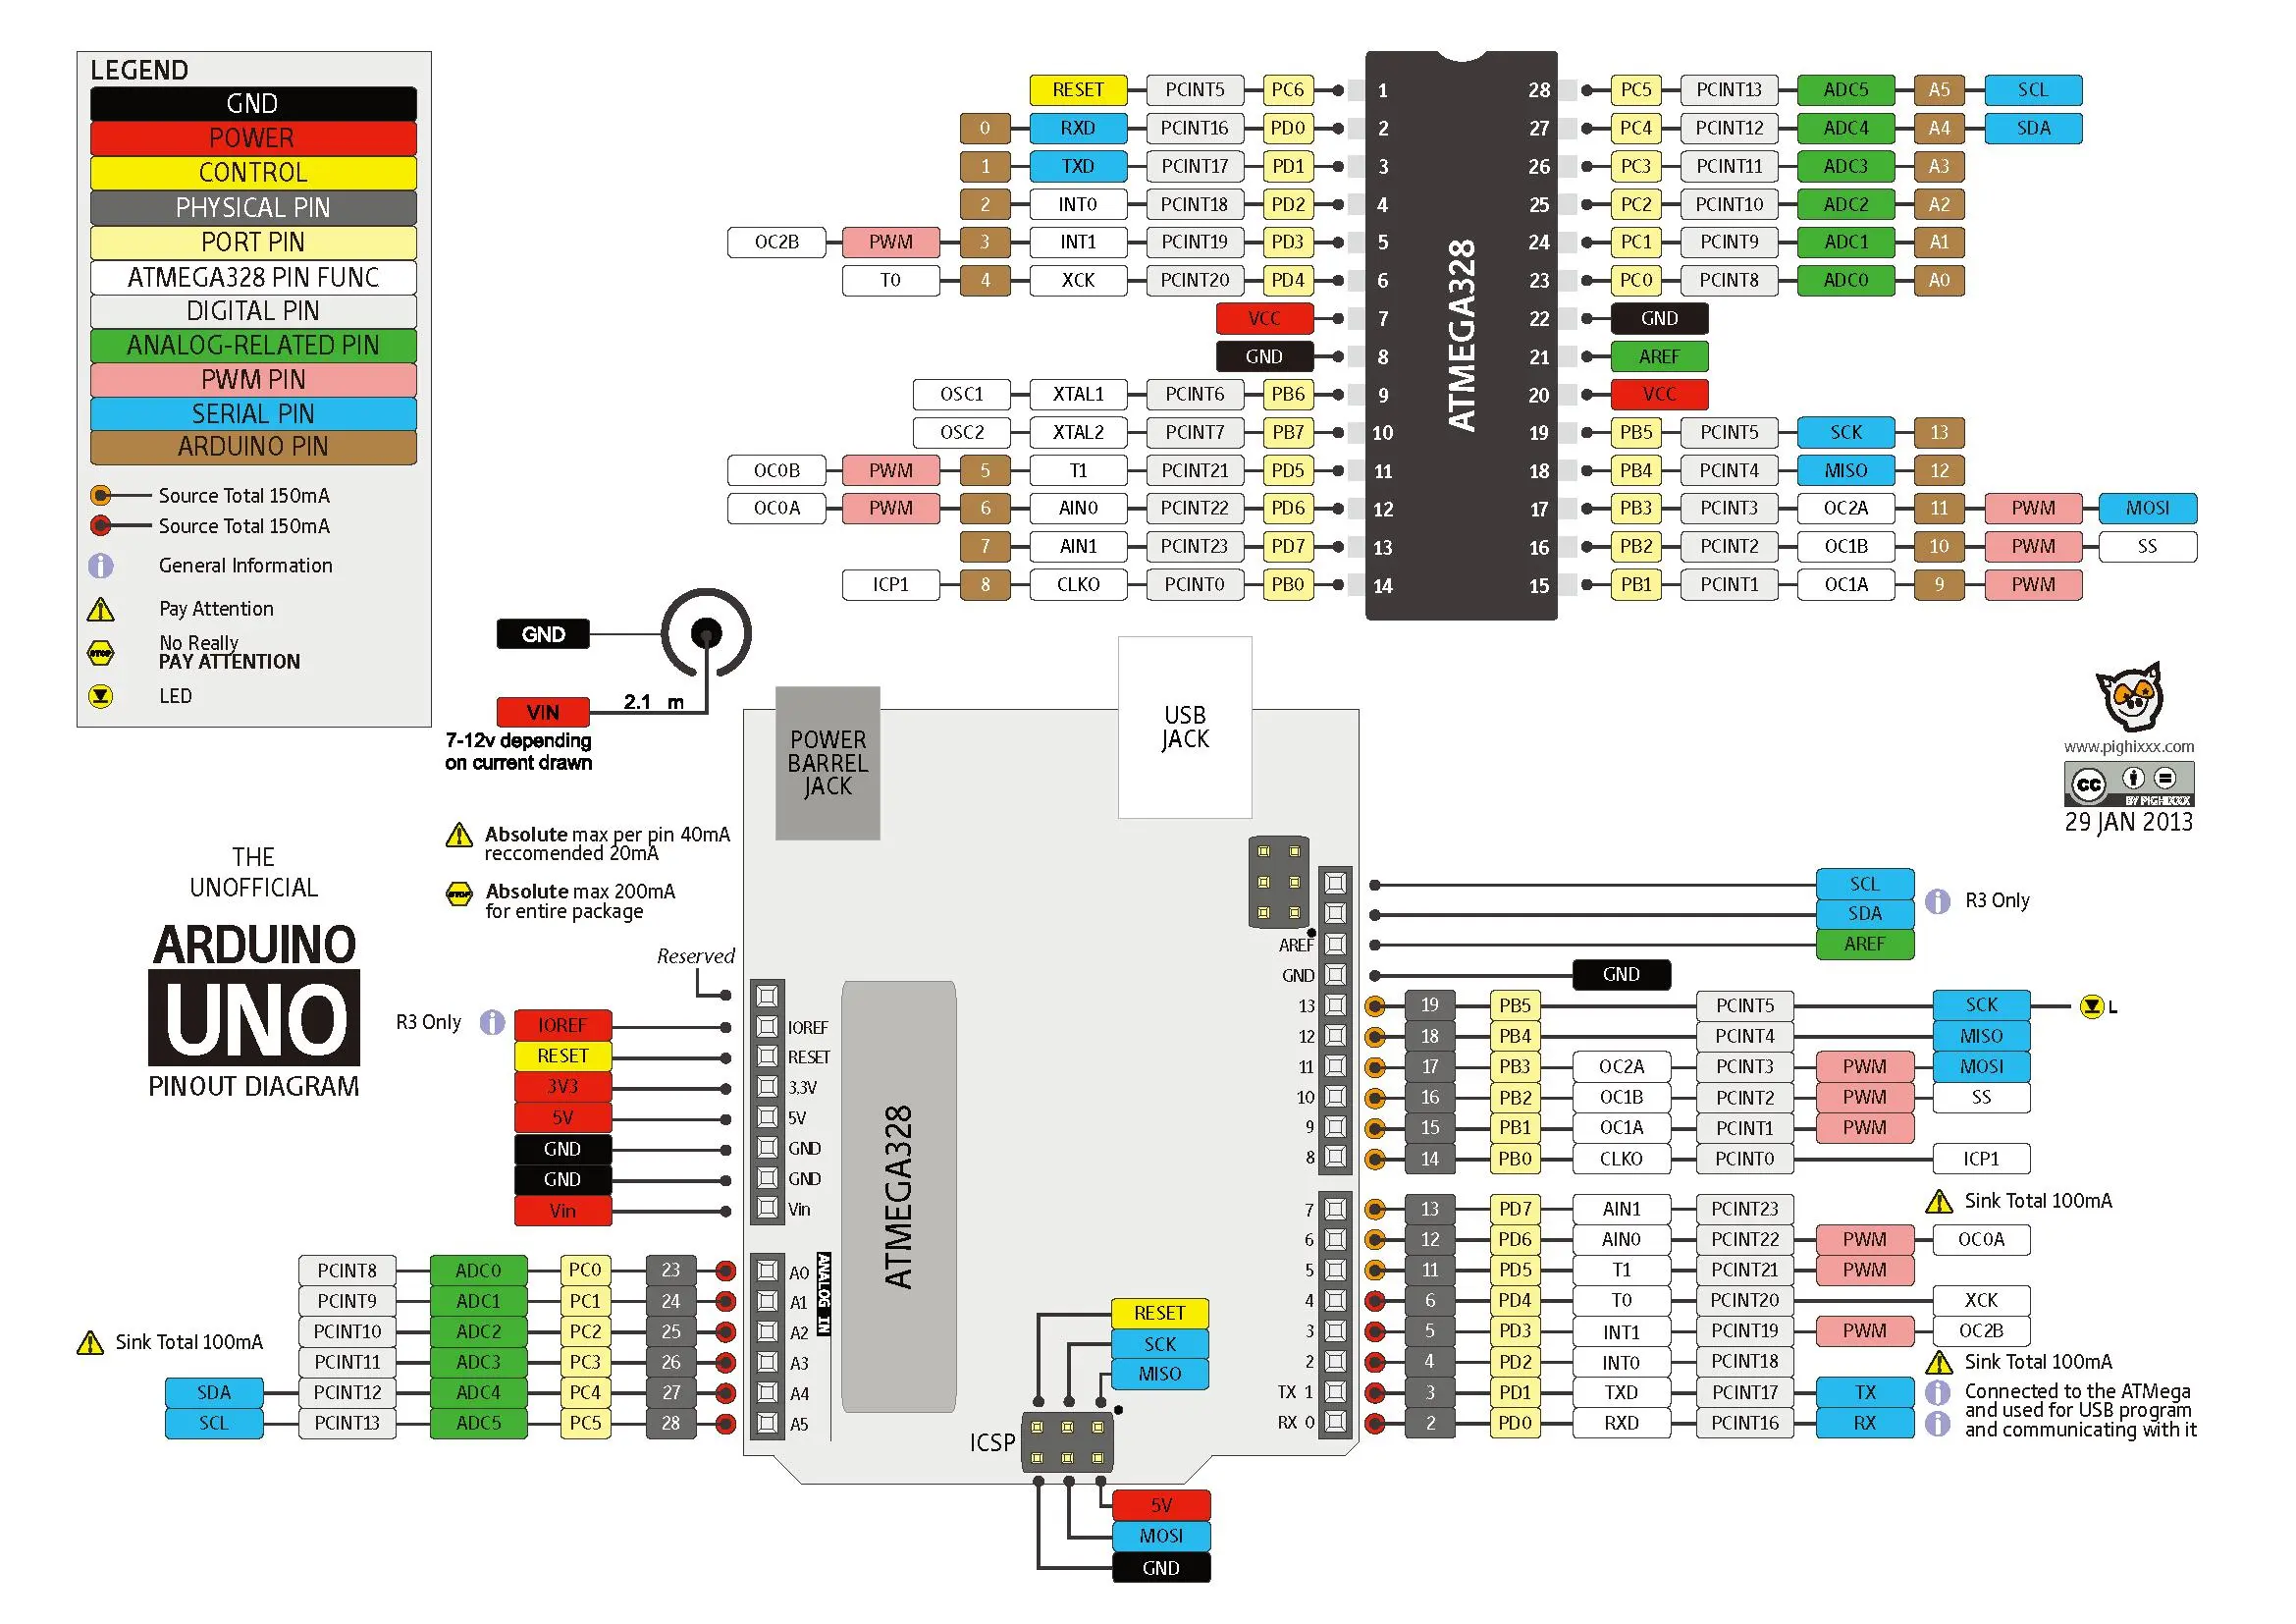
下面列举了几个常见的arduino引脚图,当然,你在官网也能查询到。
本作品采用 知识共享署名-相同方式共享 4.0 国际许可协议 进行许可。